
DIY Tiled Coffee Table (For Outside)
We are a little bit in spring cleaning, but we moved things around in the yard, swept and cleaned off all cob webs and debris under and behind the sofa, mulched the flower beds and fertilized the plants. It is looking GOOD out on the patio and right now it’s the perfect time of the day to the first thirty minutes in the morning sitting outside.


Now that this has all been cleaned up and I am spending more time here, I think I need to replace this wirery, more flimsy looking outside coffee table with a DIY tiled coffee table. I love the look of a tiled table and found a lot of inspiration on Pinterest! Tile is so versatile, you can go really bold, create fun pattern, or blend it into its surroundings.

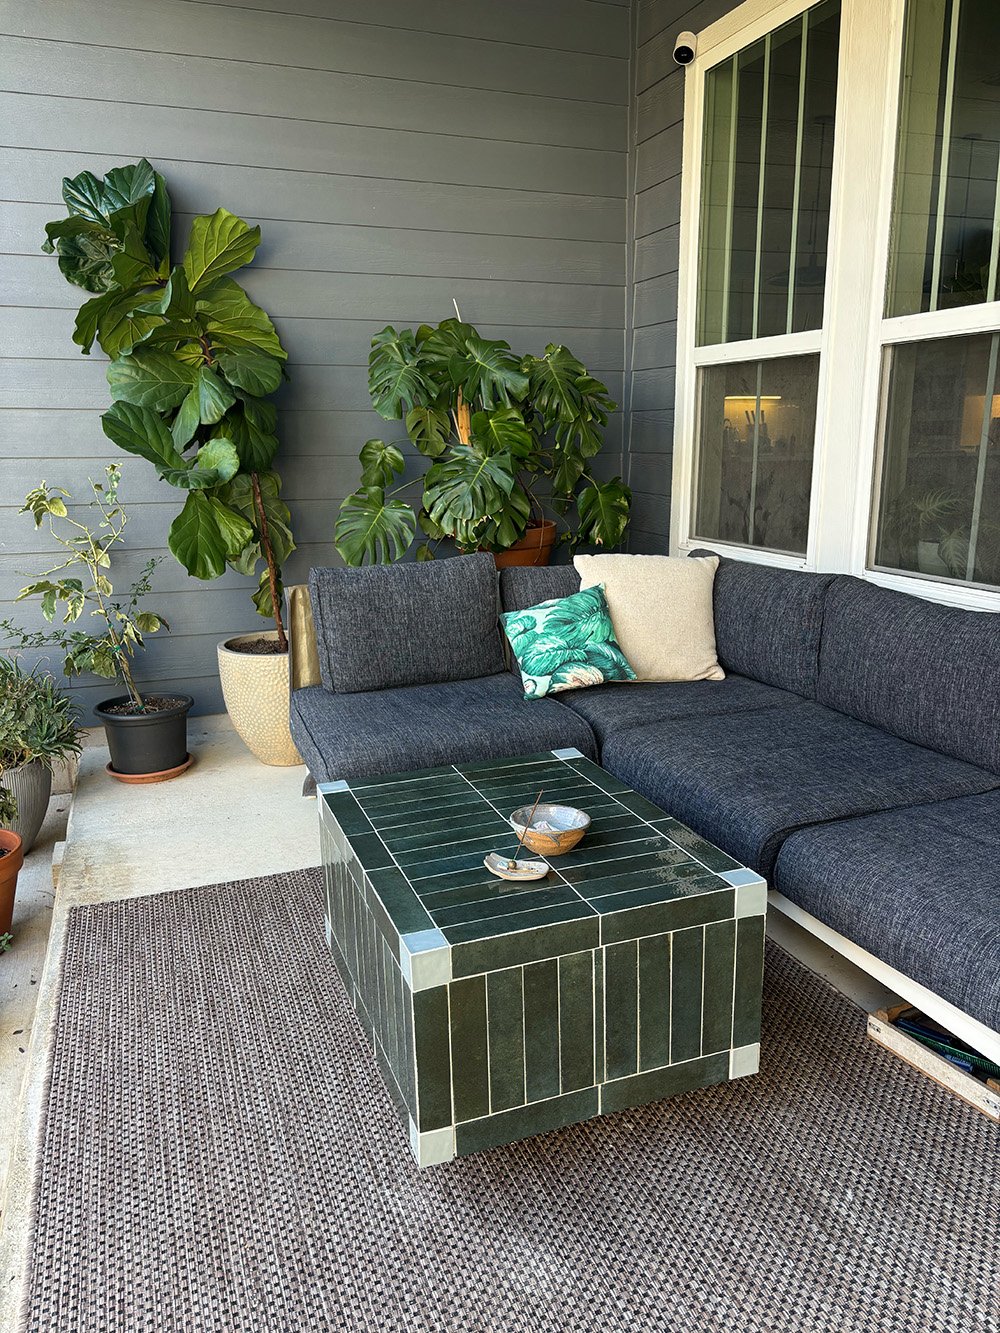
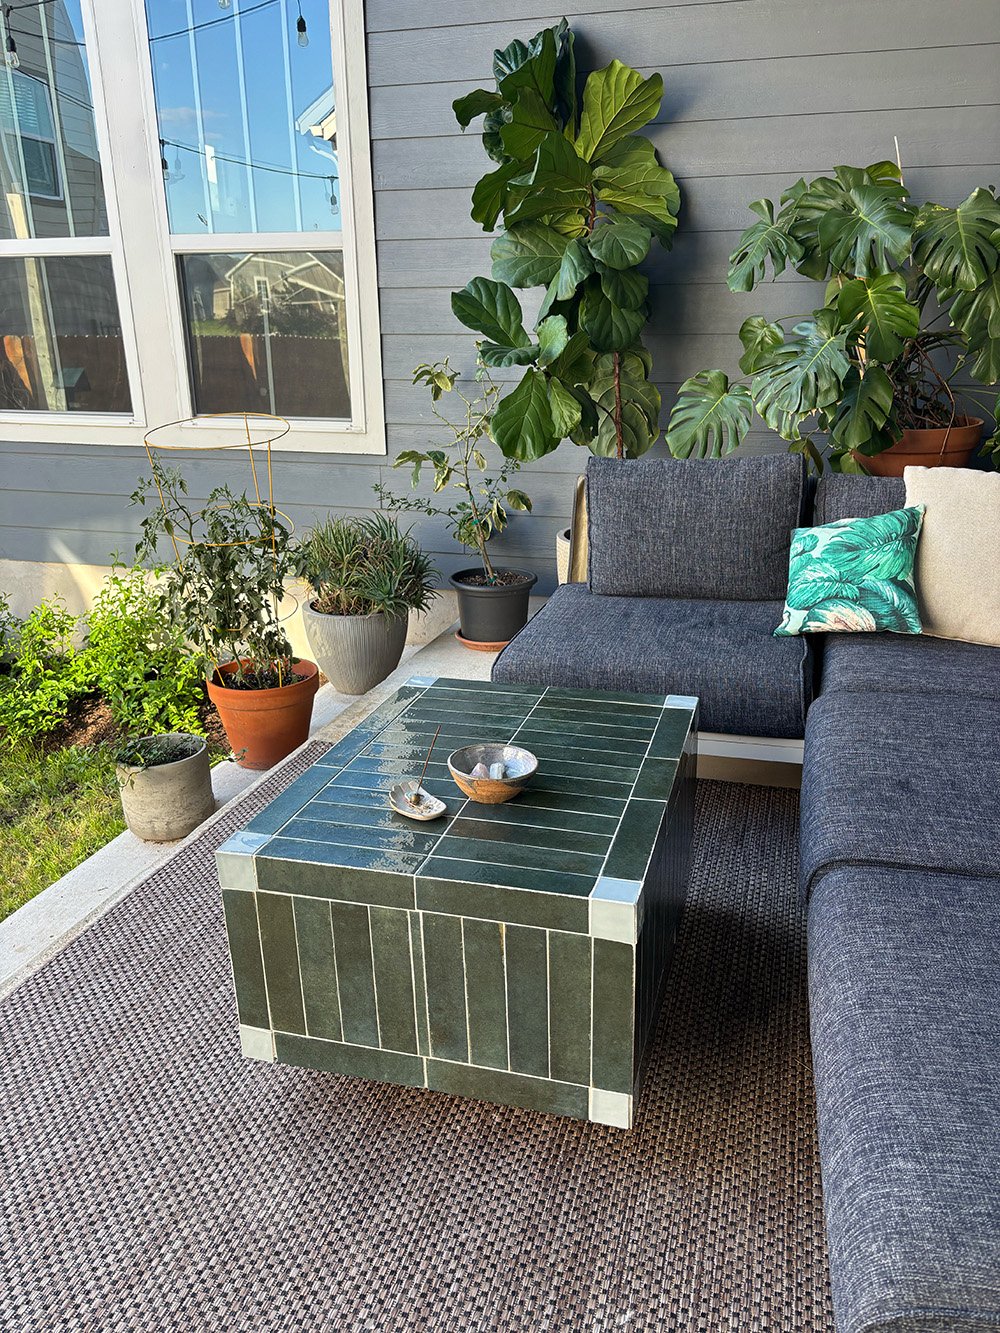
After over an hour at the tile store, I settled on something less bold, a color that would fit well within the existing color scheme of the patio (this is my serene happy spot!) but had some visual interest with texture and pattern. The first image is the pattern that I am going with for this DIY tiled coffee table - elegant, echoing the blue and green tones in the space with an enticing pattern and a little bit of playfulness with the lighter blue corners. But there were a lot more pattern that I played around with and that I also love! Maybe for a another project!


The first step is to build a skeleton / carcass that forms the base of this DIY tile coffee table. I used 3/4” plywood and settled for a rectangular shape. To minimize tile cutting, I am adjusting the size of the plywood support on the dimensions of the final design. Since I want the edges to be seamless (where tile meets from side to top or side to side I cut them at a 45 degree angle for a clean edge), the box needs to be slightly smaller than the final design. The below two images show how the tile will sit around the corners. That means that the size of the box is the size of the total design minus two times the depth of the tile.


With the adjustment in measurement aside, the rest of the box built is pretty simple. Rectangular pieces of plywood, all attached using pocket holes. Just to make sure, I dry fit the tile pattern on top. If there was an adjustment needed to the box, now is the time to do it. Once the tile is attached, it will be difficult to adjust. For my coffee table, I am going to attach some wheels. Tile is heavy and depending on the size of your table, it can get difficult to move. So I wanted some wheels to make this a little easier to use, especially as this will go outside. Once the top of the base was attached to the sides, I flipped it upside down to add the casters. It’s important to use swivel plate casters for easy use.


With the box done, it’s time to prep for and tile! Since I already know the design I want to make, I started off by cutting all corner pieces in a 45° angle. I borrowed our neighbor’s wet tile saw for this. I don’t tile that often and I’m all for being smart about resources. It helps that it doesn’t mean another tool to clutter the garage, saves money and also trash!
All saws are different, but this saw has a built-in guide to lift part of the platform to the needed angle. There are two settings - one for 35° and another for 45°. The edge pieces all get one long side trimmed, and the tile pieces for the corners get two pieces trimmed in the angle.


This is really the messy part! The water splashed pretty much everywhere when doing the cuts, and since they carry tiny sediments of the tile clay it quickly got really dusty in the garage. Make sure to wear protective gear for this step. Eye and ear protection as well as a mask are a must! Plus, the fingers started to get really close to the blade when doing the angle cuts, so we ended up using a piece of wood to push the tile through instead. Safety first! Because this step is a little involved, I found it easier to batch cut all pieces first before going about attaching the tile.
I have tried different ways before and I have found that using liquid nail is one of the best methods to attach tile to plywood. I haven’t been lucky with mortar in the past, it stuck to the tile but didn’t really stick to the plywood. At least not as strongly as I wanted. The last thing I want is for the tile on the sides to fall off on a random Tuesday afternoon! Liquid nail is also easier to use. It just goes into a caulk gun and you can easily apply it tile by tile. With mortar you have to be wary of dry times and it’s generally a messier process.
With the tile pattern laid out on the table, it was easy enough to lift up one tile at the time, apply liquid nail and secure it back to the plywood base. Liquid nail will dry within 10-15 minutes and offers a little bit of wiggle room (but not too much!) to readjust after positioning the tile on the base. I started with the top first, let it dry for an hour, then came back for the sides. I tiled the sides securing every piece with tape so it wouldn’t slide down. You can probably also tilpt the table on its side so the side you are working on becomes a horizontal level surface. That might work for the first and the second side, I’d imagine that the table would get a little heavy for the third and forth side to be tiled while lying on the side.


The corners had some additional complication to get to smooth edge. For the top corner pieces, you’ll meet four tilesea


The last step is grout. I opted for a light grey grout in powder form, so I had to mix it up at home but it allowed me to make only as much as I needed. Since it’s not a crazy big surface, I found it easiest to grout it all and then do the cleanup later, rather than grouting, sponging, grouting, sponging. It definitely needed a few rounds of sponge cleaning to get the grout haze off the tile.


I might come back later to seal the grout since I am going to keep this table outdoors, but for now, I am so happy with how this came out!


If you’re interested in learning more about how to make this tiled coffee table, grab my full guide here. It includes step-by-step instructions with photographs, has all measurements for the base structure as well as all tile cuts, and also includes tips in case you don’t want to use the angle cuts on the tile.


